Accept payments in crypto
We have wanted to accept crypto payments for the API for quite some time.
We built CryptoCheckout to solve this problem, both for us and for you.
This article serves as a complete guide for how to use this service.
Making this service from scratch is complex. You have to integrate with wallets, construct the appropriate transaction depending on the user’s wallet, set up the API such that you ensure that the user who submitted the transaction is the user who made the transaction, properly authorize the user for access to your service upon a confirmed payment, … Not to mention reminding the user of an upcoming payment or holding funds in escrow for future recurring payments.
- How we use it
- How you can use it
- How to use it
- Pricing
- Feature requests and contact
- Roadmap
How we use it
Here’s how we set it up and how we currently use it.
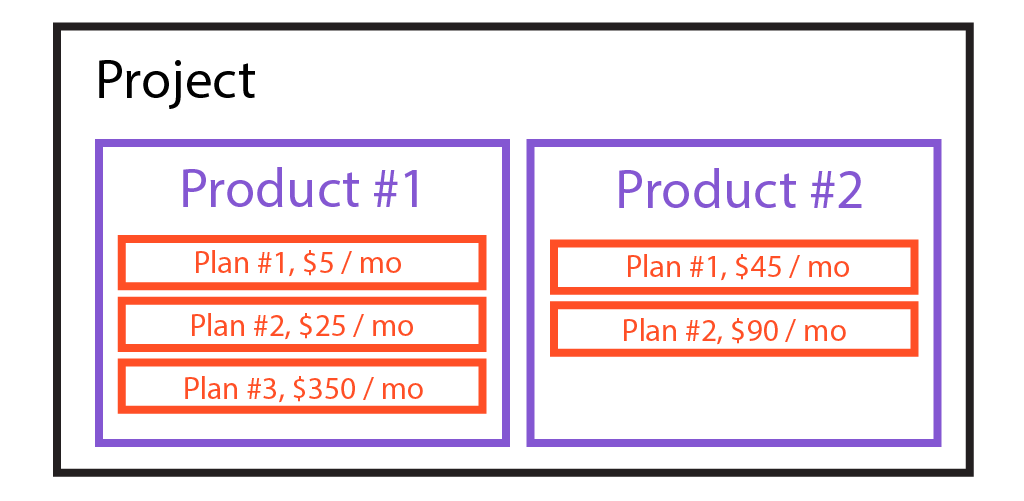
1) First, we create a project, product, plan, and price. A project represents an entity, such as a company or literal project. The project can then create a product, and charge different prices for it. Each plan represents a different tier of access (e.g, starter, premium) or timeframe (e.g., month, year). Each plan can have one or more prices, where each price consists of a chain, a token, and a number of token (e.g, 99 USDC on Solana, 99 USDT on Solana, 1000 APECOIN, 1.2 SOL, etc.).
Here’s the overview of the hierarchy of this.

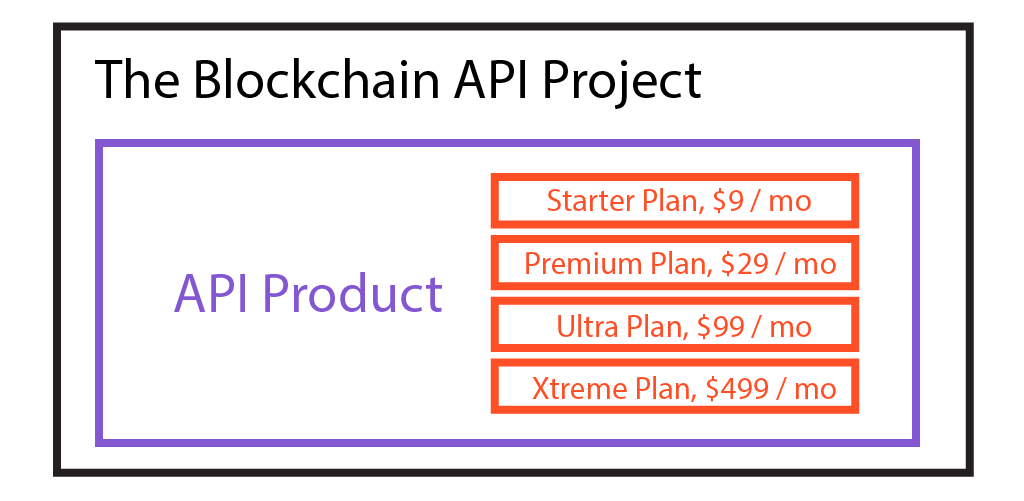
Here’s the hierarchy of our project, product, and plan structure.

2) After creating this, we now have a have a link that we can construct with our project_id and product_id.
https://checkout.blockchainapi.com/project/PROJECT_ID/product/PRODUCT_ID
You can view our product page here:
You can easily create a project, product, plan and price here.
3) Then create a plan. A plan represents a timeframe or level of access to your product. Examples are STARTER, PREMIUM or MONTHLY, YEARLY.
4) Each plan then has one or more prices. A price consists of an amount, a chain and a token. For example, once price is 99 USDC on Solana. Another might be 99 USDT on Solana, or 1 SOL.
5) And that’s it! You now just direct customers to your link. They can choose the price and plan that best fits them. Once they pay you, you have multiple ways to link the payment to a user including setting up a webhook.
Here’s a complete tutorial a complete tutorial showing me setting this up in the dashboard.
How you can use it
You can use CryptoCheckout to accept one-time payments and recurring payments in crypto for anything.
Currently, we support SOL and every SPL token on Solana. We are expanding! Let us know which chains you want next.
How to use it
Setting up the project, products, and pricing
The biggest part of getting ready to accept cryptocurrency payments is simply setting up the project, products, plans, and prices. To do this, we offer both a coding solution and no-code solution.
Once you set this up, you’re ready to accept payments.
Code solution
We are adding documentation for this soon. Hang tight!
No-code solution
You can easily setup your CryptoCheckout page in the dashboard.
We offer a ten-minute video explaining how to use the frontend here and another tutorial for how to set up the webhook.
How to accept the payments from your customers
Once you have created a project, product(s), plan(s), and price(s), you are ready to start accepting payments.
You should now have a publicly accessible link that takes the following format:
https://checkout.blockchainapi.com/project/PROJECT_ID/product/PRODUCT_ID
You can view our product page here:
You can review a list of payments both in the dashboard and programmatically with our API.
In order to link a payment to a customer and allow access to your service, see the next step.
How to be informed of a new payment
The section covers how to be informed of a new payment, both synchronously and asynchronously. The next section covers how to map this payment to a customer in your database.
Synchronously
1) Webhook
You can set up a webhook to receive the payment information to your server.
Setting up a webhook is as simple as defining the URL for the webhook property when creating the project.
We demonstrate the webhook functionality in this video tutorial.
2) Discord Webhook
You can also set up a Discord webhook URL to receive a Discord message when you receive a payment.
Asynchronously
1) Querying
When a customer gives you a secret validation code which is unique for their payment, they can redeem this payment through you.
You can then query our API for this validation code.
See a tutorial demonstrating this here and documentation for how to query for the payment here.
2) Polling
You can poll our API to pull all payments associated with the project.
3) Manual Check
You can manually check for the payment on the dashboard.
How to map the payment to a customer
Customer ID
When you set up the plan, you require a customer ID to be collected upon sign up. This can be any type of customer ID, from a mint address to an email to a Twitter handle.
See the “Project Settings” button in the dashboard.
You can set this to be optional or required.
Then, each payment is mapped to the customer ID you define. So when a customer references their payment, you receive the webhook, or otherwise look up the payment, you can see who it was who made the payment.
Payment Validation Code
After payment, each payee receives a Secret Validation Code. This code can only be seen by them when they sign a message with their blockchain wallet. No one else besides you and them can see this payment.
Thus, when the customer references this code, you can be sure that it is them who made the payment.
They can view these payments here.
You can ask them to supply this code on your app and thereafter look up the code via our API. See more here.
Wallet Sign-in
Once of the simplest ways to map a payment to a customer is to have the customer sign in with their wallet. You can learn more about how to achieve this here. Once they sign in, you can retrieve their public key and have them sign a message (to ensure that they’re not spoofing their public key). You can then query our database for a payment from that public key. You can see how to do this here.
How to get paid
There are two ways to get receive your money when accepting payments.
Payout wallet
You can receive the payment directly to your Solana wallet. Just set the public key as the payout method when creating the project. Your funds will be sent directly to you from the customer.
See the “Payout Settings” button in the dashboard here
ACH payouts
We are also beta-testing ACH payouts. If you’d like to receive a payout directly to your bank, contact us.
Pricing
Our product is free to use and set up. We take no transaction fees on payments either.
Let’s compare a 0% fee to Stripe. Here, we use the fees that Stripe takes when someone pays us for one of our plans.
| Charge | Stripe Fee | Our Fee |
|---|---|---|
| $9 | $0.65 | $0.00 |
| $29 | $1.43 | $0.00 |
| $99 | $3.17 | $0.00 |
| $499 | $14.77 | $0.00 |
That’s the power of blockchains.
Feature requests and contact
We are rapidly developing this product and appreciate all feedback. Please get in touch with us if you have feedback, and please join our community so we can connect regardless. Our Discord link is in the contact page.
Roadmap
We will update our roadmap here as we develop it. Our roadmap is subject to change as we receive your feedback.